CloudCannon: How to create a new guide
- Difficulty Medium
- Time required 15 - 30 minutes
This guide demonstrates how to create a how-to guide (similar to the one you are reading!) for the CPL Maker Lab website using the CloudCannon admin interface.
Step 1
Log in to CloudCannon. CloudCannon is a website management platform. CloudCannon will sync changes to Github Pages, where the site is hosted.
Step 2
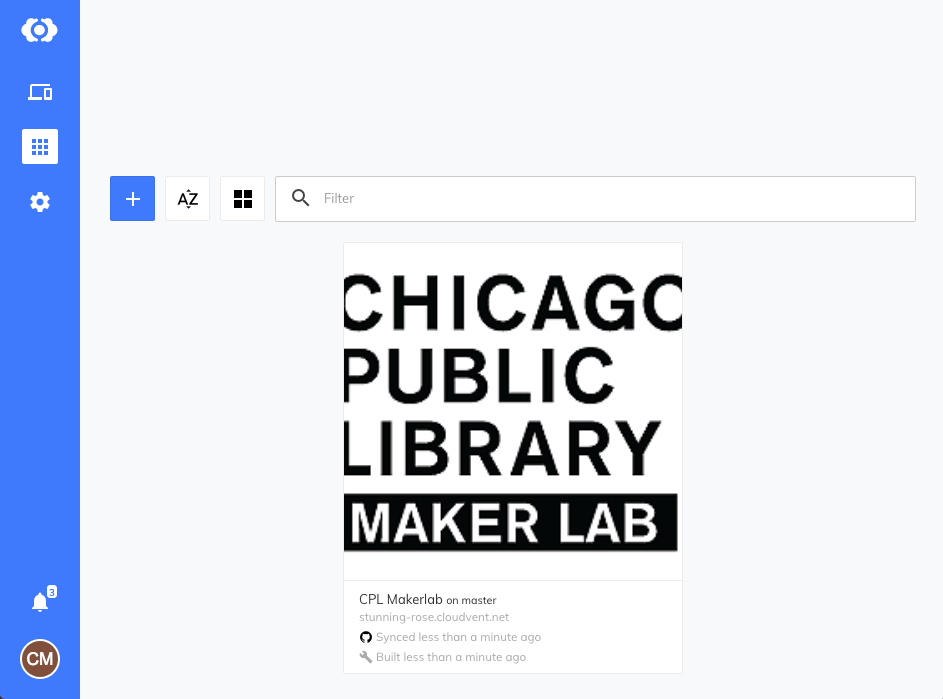
Click the large CPL Logo to open the website dashboard.
Step 3
Click on Explore > Guides > + Add Guide

Step 4
In the sidebar, enter a title for your guide.
The topic category is used to categorize guides on the guides landing page. Make sure to enter only ONE topic category for your guide. Look for an existing category that might fit before creating a new one. You can also leave this field blank if you want to keep your guide unlisted as you make changes. When you are done, just make sure to add a topic category so people can find it.
Tags will be displayed at the bottom of the page and users can click on tags to find related content. You can enter as many tags as you’d like.
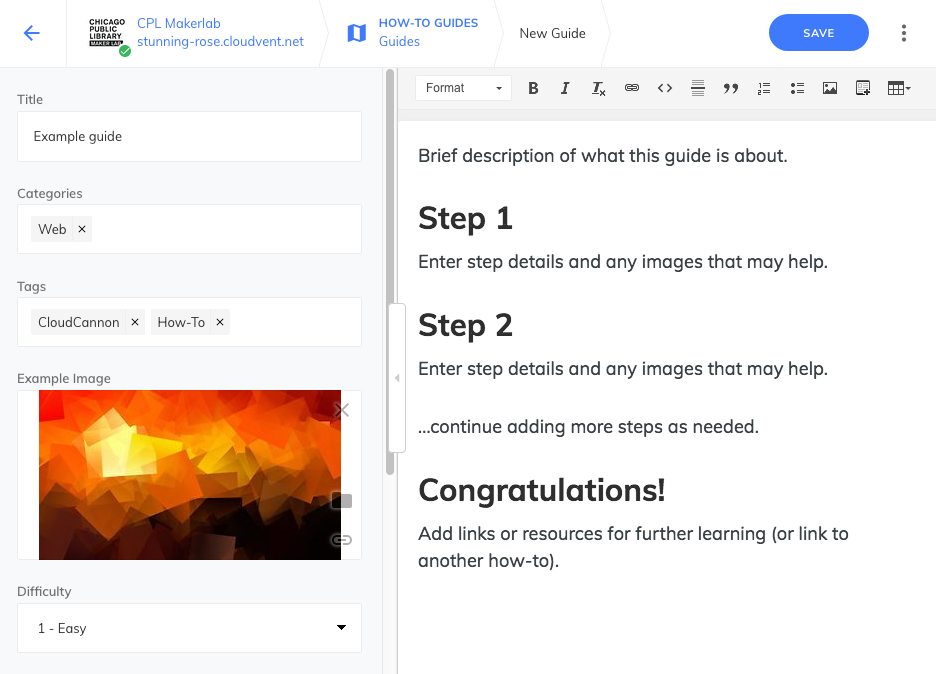
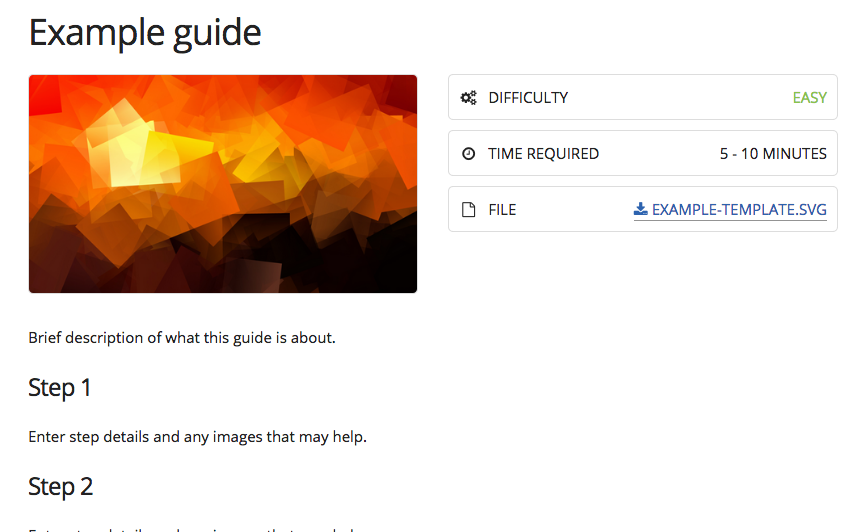
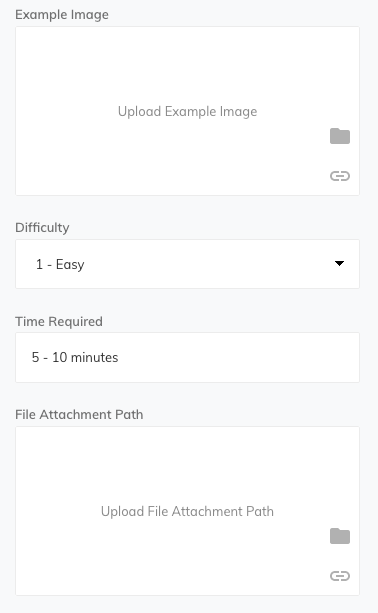
In the sidebar, scroll down to see more fields. You can upload an example image and select a difficulty level from the drop down. Enter in the time required (i.e. 15-20 minutes) and upload a file attachment if you have one (such as an .SVG template). These details will be automatically formatted and displayed at the top of your published guide.
Step 5
It’s a good idea to save early & often, so go ahead and click the SAVE button. CloudCannon will display a message as it saves and rebuilds the site.
Step 6
On the right side you will see the main content editor with a toolbar at the top. The toolbar lets you style your text, insert images, and more.
Start by adding a brief description of your guide and what the reader will accomplish after completing it.
If you have a Youtube video, you can embed it after the description using the Embed button in the content editor toolbar (hover your mouse over each icon to reveal what they are).

Step 7
It’s a good idea to label each step with a large numbered heading. This breaks up the text into smaller sections, making it easier to read and follow. Use the text editor toolbar to select the text of your heading and give it the “Heading 2” style.
Enter the instructions for your step after the heading. Use concise, plain language to describe each step. If possible, try and write your guide while actually working through the steps yourself so you don’t miss any details.
You can insert a screenshot or image to help explain the step. To do this, put your cursor where you’d like to insert an image and then click the Image icon in the toolbar. Try and resize images whenever possible before uploading – you can’t edit or resize images through CloudCannon. An image size around 1024px wide should work well. In general, we want to avoid very large images because they take up a lot of bandwidth and slow down the page load for site visitors, especially those reading on a mobile phone.

Step 8
Continue adding new steps as needed. You may need to revise the number of steps as you go so that each step is not too long or too short. Make sure to hit SAVE frequently as you work.
Step 9
Your new guide will be published at cplmakerlab.github.io/guides. Note that it may take a few minutes for any changes to appear as your site must resync & rebuild after every save.
Congratulations!
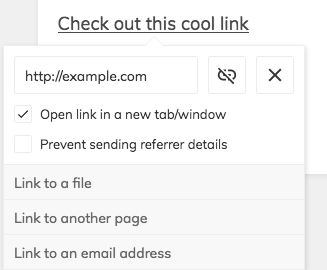
Congratulate the reader for finishing the guide! You can insert links to additional resources or guides by highlighting some text and then clicking the Link icon in the toolbar. The link functionality also lets you upload additional files if needed.
![]()