Tinkercad Quickstart Guide
- Difficulty Easy
- Time required 10 minutes
Tinkercad is an easy to use yet powerful 3D design program that runs right in your web browser. By adding and combining simple 3D shapes you can create almost anything you can imagine! In this guide you’ll learn how to create a new project, how to add and manipulate shapes, and how to navigate in Tinkercad.
Step 1: Login to Tinkercad
In a web browser, navigate to Tinkercad.com and create a new account if you don’t have one yet. If you already use Fusion 360, you can use the same Autodesk login.
Step 2: Create a new design
Click the “Create new design” button to open up a new project.
Step 3: Add a shape
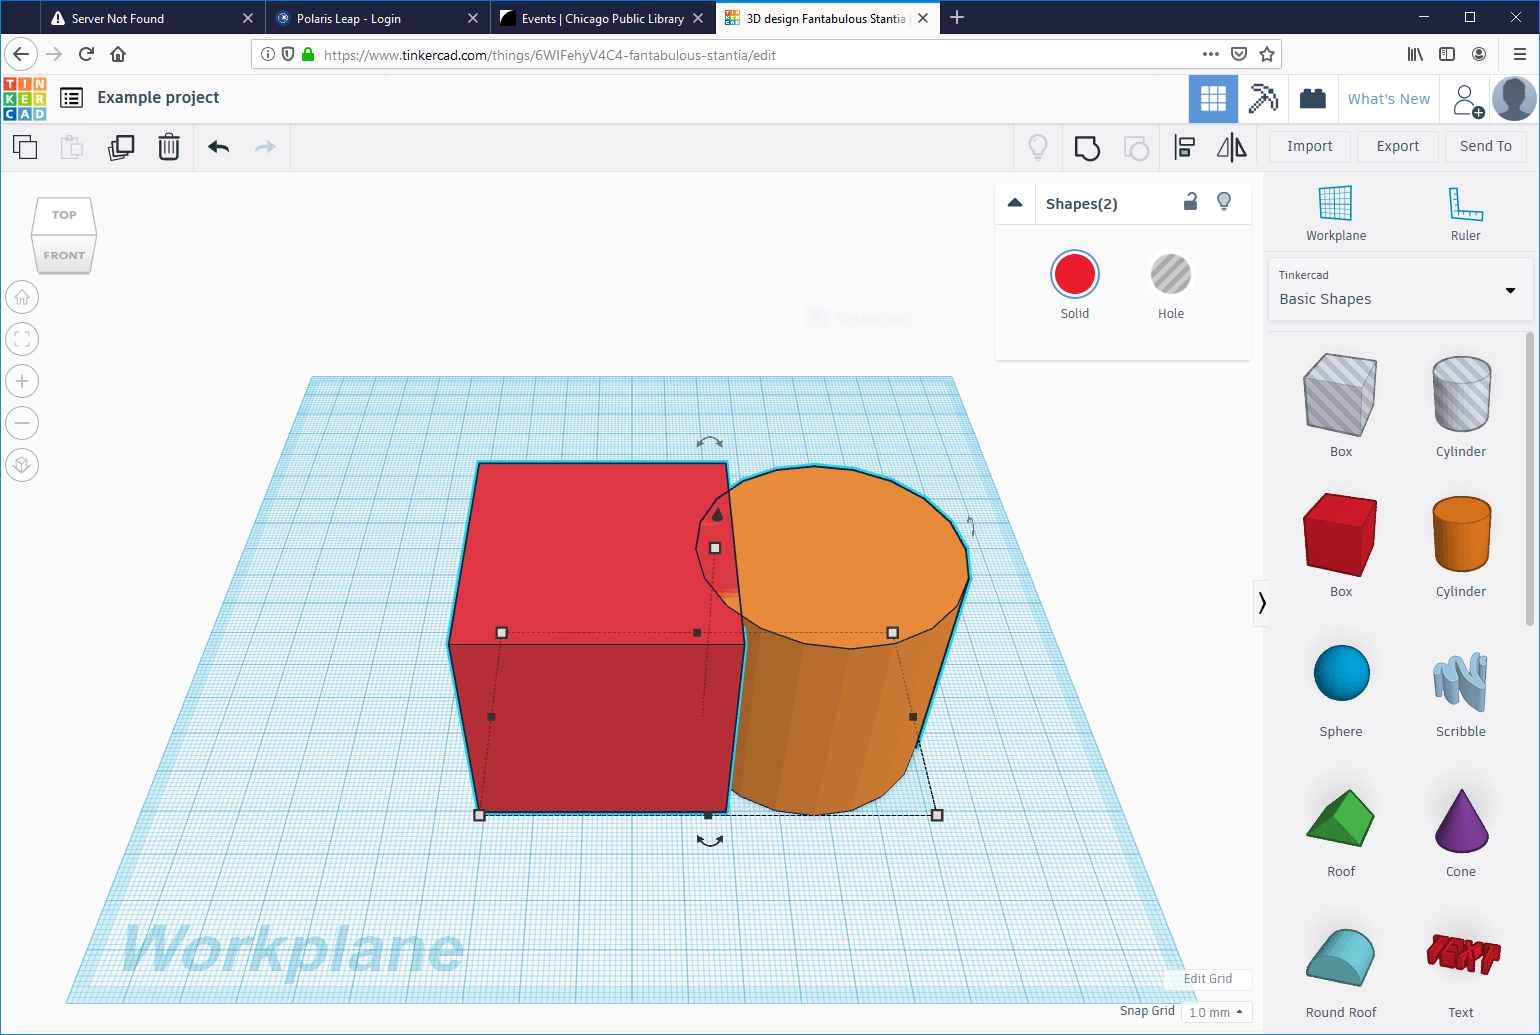
When your project first opens, you’ll see a large window on the left with a flat 3D workplane, and on the right a sidebar with several shapes to choose from. You can add a shape to the workplane by simply clicking and dragging a shape from the sidebar and dropping it on to the workplane.
Step 4: Adjust the camera view
Imagine that you are looking through a camera at the shape you just created. To look at the shape from a different perspective, you can pan, zoom, and orbit around the workplane.
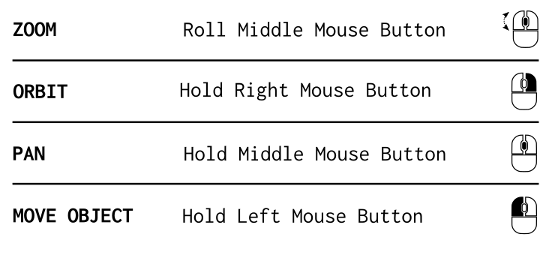
The controls for zoom and orbit are located on the left side of your screen. You can also use mouse shortcuts (see below) to control the camera.
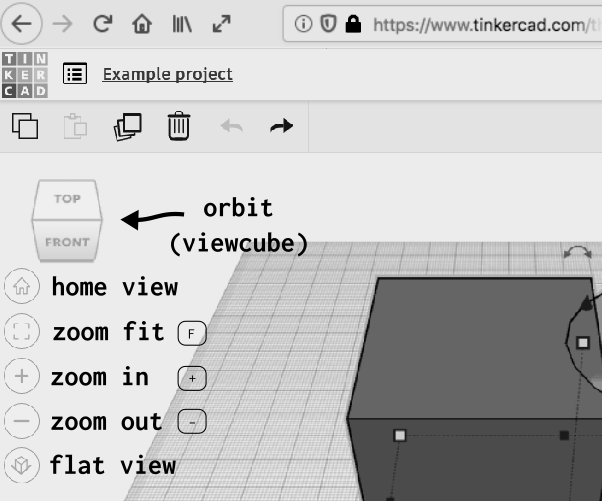
- ORBIT: Click and drag the large cube shape (viewcube) to orbit. Or you can click on one side of the cube to quickly rotate to that side.
- HOME VIEW: Click the home button to reset the camera to the default view.
- ZOOM: Click on the zoom fit button [F] to focus on a specific shape. Click on the + button to zoom in, and and the - button to zoom out.
- FLAT VIEW: When the camera is looking straight down from one side (i.e. top) sometimes shapes will look distorted. Switching to Flat View will flatten the shapes so they look less distorted. This is similar to changing the camera lens.
Step 5: Move, resize, and rotate shapes
- MOVE: Click on a shape in your workplane to select it. When selected, click + drag the shape around to a new position. You can also use the arrow keys on your keyboard to move it around on the workplane.
- RESIZE: With a shape selected, look for tiny boxes (a.k.a. handles) near each edge and corner of the shape. You can click and drag these small handles to adjust the length and width of your shape. There is an additional fifth square located towards the top middle that will adjust the height.
- ROTATE: When a shape is selected, look for the three curved arrow handles around your shape. Click and drag on a curved arrow to rotate your shape in that direction. There are three directions you can rotate your shape, one for each axis of rotation (x, y, and z).
- LIFT: In addition to moving your shape around on the workplane, you can also lift the shape up so that it floats above the workplane. With the shape selected, look for a black cone near the top of your shape. Click and drag this black cone to raise or lower the shape. Press D on your keyboard to drop the shape back down to the workplane.
- DUPLICATE: Click on a shape to select it, then press the Duplicate button [CTRL + D] in the top menu to duplicate it in the same position. Then drag the duplicate copy to a different area of the workplane. You can also achieve this using the Copy and Paste buttons in the top menu.
- ALIGN: Shift + click to select multiple shapes. Then press the Align button [L] in the top menu. You’ll see 3 circles along each axis (x, y, z) that let you align several shapes to a common edge or center line.
- MIRROR: Shift + click to select a shape. Then press the Mirror button [M] in the top menu. You will see 3 arrows along each axis (x, y, z). Clicking on one of the arrows will flip the shape along that axis.
Step 6: Group shapes/holes (combine)
Drag another shape to the workplane from the right hand menu. Move it so that it overlaps with your first shape. Shift + click to select both solid shapes and then press the group button in the top menu. You now have a new combined shape! Click the ungroup button to break apart a combined shape.
Now select one of your shapes and in the shape dialog box convert it to a hole. A hole does not have a color and will look translucent. Now select both the shape and your hole and group them. The hole will be subtracted from the shape. Ungroup the resulting shape to reverse this action.
Congratulations!
Now you know the basics of how to navigate and combine shapes in Tinkercad! Download and print out the Tinkercad Quickstart PDF to help you remember what you’ve learned.
Next things to try:
- Import and modify a design (STL file) from Thingiverse.com
- Export your design as an STL file for 3D printing
- Try creating a realistic rendering of your 3D model in Blender